Easy Peach Pie Bars
Summertime Sweetness: Easy Peach Pie Bars Recipe
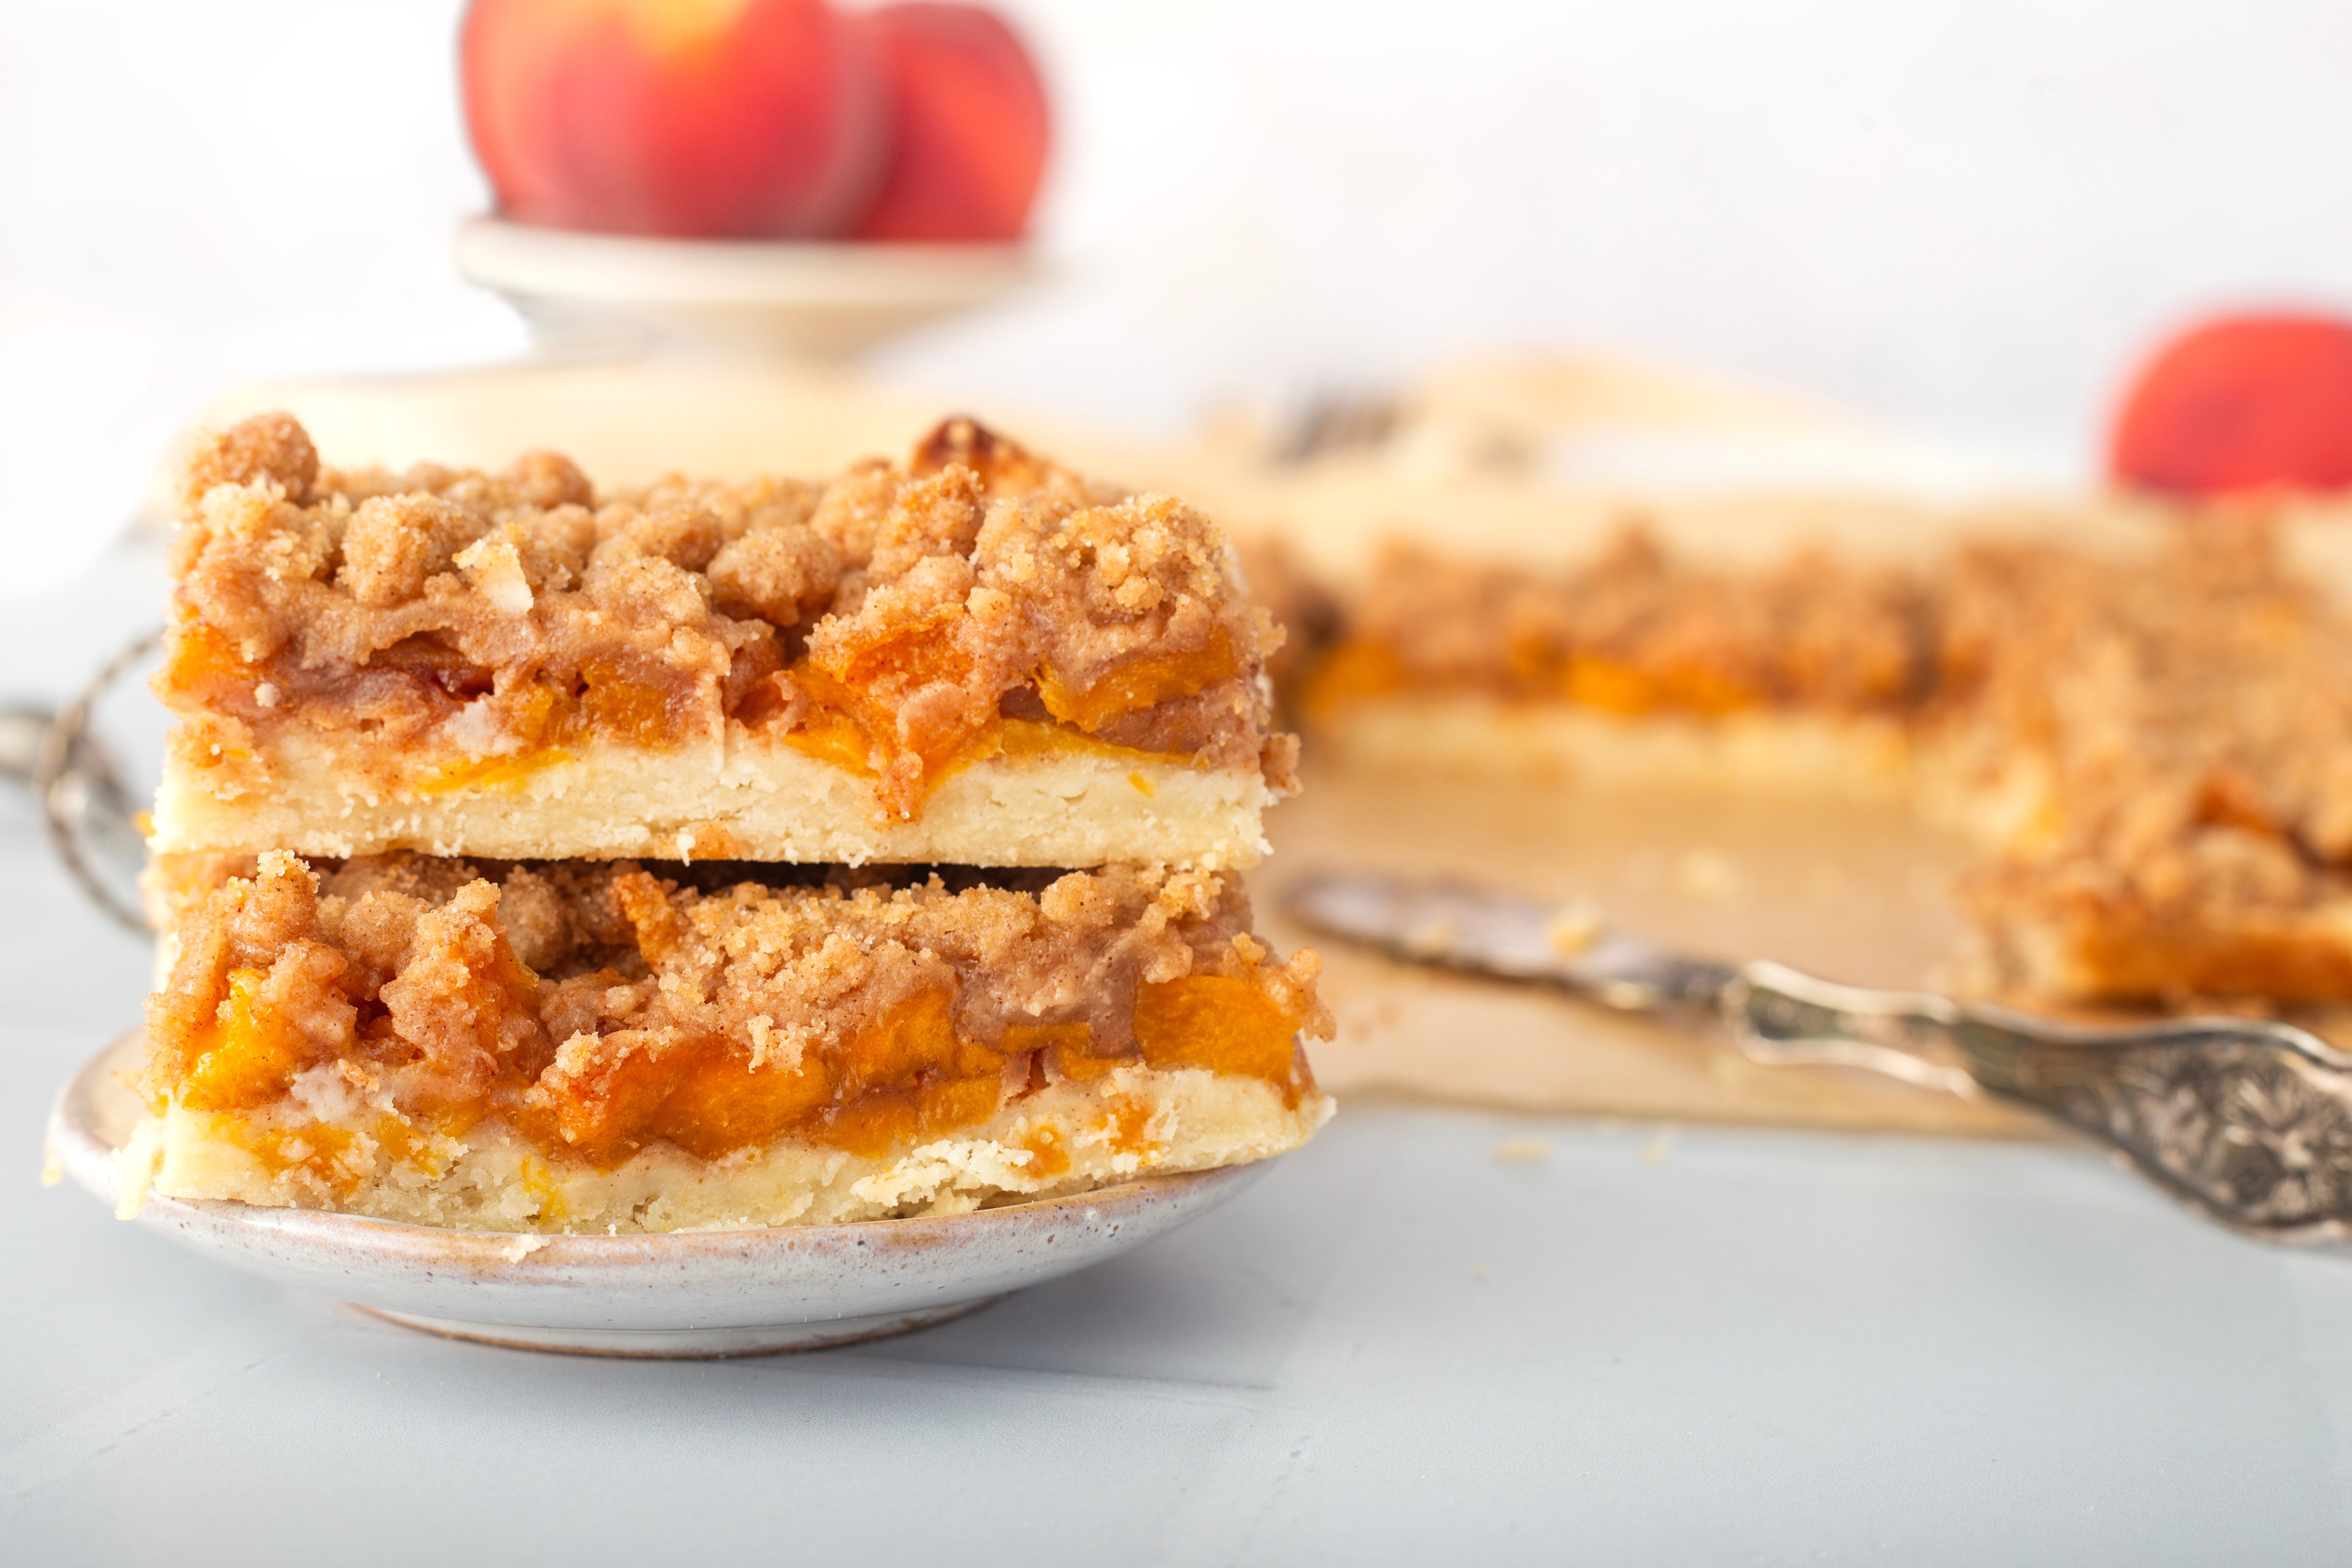
Transforming the iconic peach pie into an easy-to-share delight, these Easy Peach Pie Bars capture the essence of summer in every bite. Imagine juicy peaches enveloped in a buttery crust, topped with a perfect crumble – all in the convenient form of a bar. It’s this simplicity and burst of fresh peach flavor that make this recipe an instant favorite. Whether you’re a seasoned baker or new to the kitchen scene, the simplicity of preparation ensures a fun baking experience with a delicious outcome. With peach season at its peak, there’s no better time to bring the joy of juicy, ripe peaches into your home. After all, what’s summer without the sweet touch of peach desserts?
Key Takeaways:
- Peach pie reimagined: Classic peach pie flavor in a convenient, shareable bar form.
- Fresh is best: Utilize fresh summer peaches for the ultimate peach dessert experience.
- Easy and accessible: Perfect for bakers of all levels, ensuring a delightful baking process.
Gathering Your Ingredients
As we dive into the heart of peach season, there’s no better way to celebrate than with a batch of Easy Peach Pie Bars. These bars meld the buttery crust, juicy peaches, and crumbly topping into a harmonious dessert that sings of summer. To start, you’ll need a blend of fresh summer peaches – the star of our peach filling. Ensure they’re ripe for the best flavor and juiciness. Alongside these, granulated and brown sugar, a touch of lemon juice, cornstarch, and a whisper of cinnamon will enhance the natural sweetness of the peaches.
For the crust and crumble topping, grab your all-purpose flour, cold butter, powdered sugar for a tender base, and a bit more brown sugar and cinnamon for that perfect crumbly texture. If you’re looking to make this dessert even more indulgent, a dollop of sour cream or a big scoop of vanilla ice cream serves as the perfect companion when serving.
I love providing options for everyone, so if you’re out of brown sugar, don’t fret. A mix of granulated sugar and a bit of molasses can work in a pinch. And for those avoiding dairy, a solid plant-based butter can substitute nicely for the butter. It’s all about making these peach pie bars your own and enjoying the process, from the peach slicing to the final sprinkle of that crumble topping. Let’s get baking and bring some summertime sweetness to our tables!
Preparation Before Baking
Before we dive into the mixin’ and bakin’, let me share a couple of secrets with you about getting these peach pie bars just right. First off, lining our baking dish with parchment paper isn’t just a step to skip. It’s our ticket to beautifully presented bars that slide out without a fuss, making sure each piece looks as tempting as they taste. And let’s not forget, it makes clean-up a breeze, and who isn’t a fan of that?
Now, onto the magic of room temperature ingredients. Ever wonder why your pastry didn’t come out as flaky or your batter as smooth as you hoped? The key is in the temperature. Ingredients like butter blend so much better when they’re not straight from the fridge. It’s a small step, but believe me, it makes all the difference in getting that texture and taste of the peach pie bars spot on, every single time.
Making the Crust

Now, let’s talk crust, because any peach dessert aficionado knows that the foundation of any drool-worthy bar cookie, especially our juicy peach bars, begins with that perfect, buttery crust. Grab your food processor, because we’re about to make magic with cold butter – and yes, it must be cold for that flaky, golden brown perfection we’re after. First, toss your all-purpose flour, a sweet whisper of powdered sugar, and a pinch of salt into the processor.
Then, the star of the show: cold, diced butter. Pulse it a few times until the mixture resembles small clumps, kind of like the top of the crumbly topping we all adore. This flour mixture is about to become the base of our easy peach pie bars, holding all that fresh ripe peach filling in sweet embrace. It’s the best way to marry the buttery crust with the soft, sweet peaches, creating peach crumb bars that are, quite literally, to die for. Oh, and before I forget, the moment you lift that crust out of the food processor and press it into the bottom of the pan, that’s when the magic starts to happen.
Preparing the Peach Filling
Now, let’s talk about the heart of today’s recipe – the peach filling. Grab your biggest bowl from the cupboard; it’s time to give those juicy peaches some love. We start by tossing diced peaches, the ones you’ve patiently peeled and pitted, into the bowl. You’ll notice how these fresh ripe peaches gleam like little jewels. Next, we sprinkle the granulated sugar over them, just enough to sweeten the deal without overshadowing the natural peach flavor.
But here’s my secret ingredient – lemon juice. Just a splash does wonders, brightening the peach flavor and adding a zing that lifts the whole dish. Plus, it keeps our peach slices from turning brown, ensuring our peach mixture looks as good as it tastes. To this, we add a sprinkle of cinnamon for warmth and a bit of cornstarch to thicken everything up, ensuring our peach filling creates the perfect, gooey middle layer in our bars. Give it a gentle stir, letting each peach piece get coated in the flour mixture and all the goodness we’ve just added. There! Our peach mixture is ready to be layered over our buttery crust. It’s simple, it’s sweet, and it’s about to bake into something marvelous.
Assembling the Pie Bars

Once we’ve got our buttery crust pre-baked to just the right golden brown, it’s showtime for those juicy peaches. I start by spooning peaches mixed with that perfect blend of brown sugar, a hint of lemon juice, and a sprinkle of cinnamon right onto the crust. It’s all about creating a harmony of flavors here. Then, there’s a little trick to ensure every bite is as peachy as the next – evenly spread the peach mixture over the crust. We’re not just making a dessert; we’re crafting an experience.
Now, for the grand finale – the crumble topping. Picture this: a mixture that’s part flour mixture, part brown sugar, with a touch of cinnamon, and those cold butter clumps, all coming together to form this crumbly texture that’s just divine. It’s like the best part of a peach cobbler and a classic peach pie had a baby. Scatter this over the top of the peaches, and let’s not be shy. An even layer here means every bite will have that satisfying crunchy texture contrasted with the soft, sweet peaches beneath. It’s like a little dance of textures in your mouth.
And there you have it – our peach crumble bars are primed for the oven. These steps are what make this recipe a great recipe. They’re proof that a little bit of attention to the layering process goes a long way in ensuring those flavors meld beautifully while baking. Every time the scent fills the kitchen, it feels like peach season has come to say hello, no matter the time of year.
Baking to Perfection
Now, let’s get these peach pie bars to that perfectly golden brown finish we’re all dreaming about. First off, heating your oven to the right temperature is crucial. For this recipe, setting it at 350°F (175°C) will get you those juicy peaches encased in a crumbly topping and buttery crust that’s just divine. Baking time is equally important, and around 35-40 minutes should do the trick. Keep your eyes peeled for that golden brown charm – it’s our cue that the bars are ready to come out.
Here’s a tip from my kitchen to yours: Avoid the temptation to overcrowd your oven. Spacing your peach pie bars allows for even baking, ensuring each piece comes out with that perfect crumbly texture we’re aiming for. Trust me, it’ll be worth the wait when you pull out that baking dish and get hit with the aroma of sweet, ripened peaches mixed with a crumble topping that’s just right.
Cooling and Serving Tips

Once your peach pie bars have reached that golden brown perfection, and the aroma of juicy peaches and cinnamon fills your kitchen, it’s time to let them cool down properly – trust me, it’s worth the wait. The best way to cool these sweets to perfection is by placing them on a wire rack. This allows air to circulate around them, helping to avoid a soggy bottom – because nobody likes a soggy bottom, right?
Now, here comes the hardest part – waiting to slice into them. Giving your bars enough time to cool is crucial for getting those clean cuts. I’d suggest waiting at least an hour; this patience ensures that the peach filling sets nicely, which means individual bars keep their shape and all those lovely layers stay intact.
For serving, I like to go all out. Place a sweet peach bar on a plate and top it off with a big scoop of vanilla ice cream. It’s the perfect way to enjoy this peach dessert, turning a simple treat into an indulgent delicacy. Who could resist a bite of that?
Storing Leftover Peach Pie Bars
Now, let’s talk about what to do with any leftover peach pie bars – because trust me, it’s just as important as the baking. Once everyone’s sweet tooth is satisfied and you’re staring down those few remaining slices of summertime sweetness, knowing the best way to store them can make all the difference. First things first, you’ll want to ensure those bars stay as delightful as the moment they came out of the oven. Grab an airtight container – this is your new best friend. Gently place the bars inside, layering parchment paper between them if you’re stacking. This little trick keeps them from becoming one big peachy clump.
If you’re considering the freezer route, wrap each bar individually in aluminum foil before tucking them into a freezer-safe airtight container. This extra step preserves that mouthwatering buttery crust and juicy peach filling, ensuring they’re just as heavenly when thawed. Remember, whether it’s enjoying them today or savoring later, your peach pie bars are a taste of summer that never has to end.
Seasonal Variations and Final Thoughts

Just like the best flavors evolve with the seasons, today’s recipe for Easy Peach Pie Bars has a unique charm that can transcend peach season, adapting beautifully with a variety of your favorite fruits. As we dive into this culinary journey, remember, whether it’s juicy peaches, ripe cherry pie bars, or even tart slices of apples, the essence of this dish shines through with each fruit’s individual character. The best part? Each variation brings its own zest to the table, enriching your baking repertoire and inviting a delightful twist on the classic peach pie.
Picture this: it’s not peach season, but you’re craving these mouthwatering bars. No worries! Swap peaches for fresh ripe peaches’ cousins like strawberries or blueberries, employing the same simple glaze or crumbly topping, ensuring those bars are just as inviting. Imagine the burst of flavor from a combination of peach slices and raspberries, or the sweet tanginess of blueberries nestled in that buttery crust. The possibilities are endless, and so is the fun in experimenting.
Each season holds its charm, offering a canvas to paint with the bright colors and flavors of whatever fruit is peaking. From the warmth of summer peaches to the rich tones of autumn apples, adapting this easy recipe to the rhythm of the seasons keeps your dessert table exciting and diverse.
So, the next time you find yourself with a bowl of fruit – any fruit – and a sweet tooth, think back to this versatile recipe. Embrace the adventure of tweaking it to fit the season, the occasion, or just your current craving. After all, the best part of cooking is not just the delicious results, but the joy and creativity poured into the making. Here’s to many more baking days ahead, filled with the aroma of fresh desserts and the warmth of shared memories. Celebrate each season with its flavors, and let your kitchen be a place of endless exploration and delight.

Easy Peach Pie Bars
Ingredients
- 3 cups chopped fresh peaches, peeled and pitted
- 1/4 cup granulated sugar
- 1 /2 teaspoon cinnamon
- 2 tablespoons lemon juice
- 3 tablespoons cornstarch
- For the Crust:
- 2 cups all-purpose flour
- 1/2 cup powdered sugar
- 1/4 teaspoon salt
- 3/4 cup butter, cold, diced
Instructions
- Streusel Topping
- Preheat your oven to 350°F (175°C). Grease and line an 8×8-inch square baking pan with parchment paper, leaving a bit of overhang on two opposite sides to make lifting the bars out easier later.
- In a small bowl, mix together the flour, brown sugar, granulated sugar, and cinnamon until everything is evenly combined and no lumps remain. Stir in the melted butter until the mixture becomes crumbly and resembles damp sand. Set aside.
- Crust
- In a food processor, pulse the flour, powdered sugar, and salt a few times to combine. Add in the cold, diced butter and pulse again until the texture looks like coarse crumbs, with some small butter pieces throughout. Pour the mixture into the prepared pan and press it down evenly to form the crust.
- Bake for 18–20 minutes, or until the edges are lightly golden and the crust has set. Remove from the oven and let it cool slightly while you prepare the filling.
- Apple Layer
- In a small bowl, combine the diced peaches with cinnamon, 1 tablespoon of granulated sugar, a squeeze of lemon juice and cornstarch. Toss until the peaches are coated.
- Layer the cinnamon-sugar peaches evenly on top, then sprinkle the reserved streusel topping over the peaches.
- Bake for 35–40 minutes, or until the top is lightly golden. Let the bars cool completely in the pan on a wire rack.
- Transfer to the refrigerator and chill for at least 1 hour to allow everything to firm up. When ready to serve, lift the bars out using the parchment overhang and slice into squares. Enjoy!
